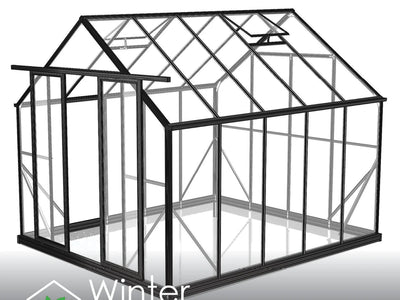
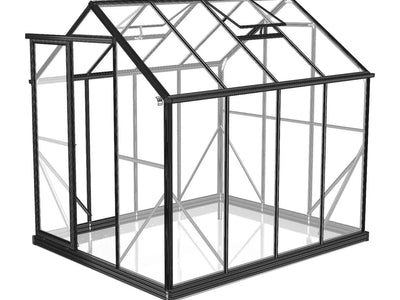
The best base to put a greenhouse on is a level, free-draining pad, usually compacted gravel or a concrete slab. Australian greenhouses also need solid anchoring, so here's how each base option handles wind, rain and clay soil.

Understanding Structural Requirements First
A greenhouse frame is built square and expects the ground under it to be square too. When the base sags or slopes, the frame twists and everything else starts to complain.
Time spent on the base pays off later. Rush it and you'll be chasing doors that won't latch for years.
Do I need a base for a greenhouse?
Yes. Even a small greenhouse needs something firm and level underneath it, and something to bolt down to.
The base does a few jobs. It holds the frame in shape and gives water somewhere to go. It also gives your anchors something solid to bite into. Wind is the real test here, and a greenhouse that isn't anchored properly can lift.
Worth knowing before you dig: larger fixed structures can need council approval. NSW, for one, runs an exempt development pathway that lets some minor structures go up without a development application, but only where every standard in the code is met, size, height and boundary setback included. Rules vary by council and state, so check yours and get the answer in writing.
Can I put a greenhouse directly on soil?
You can, and it's the cheapest way to do it. It's also the option that causes the most grief later.
Bare soil settles unevenly, holds water after rain, and pushes weeds up through the floor. Levelling it accurately is hard, and keeping it level through a wet winter is harder again.
If soil is your only option for now, at least anchor into ground pegs or screw-in anchors rated for your site. Treat it as a temporary base and plan to upgrade.
Foundation mistakes that threaten structural integrity
- Building the base the same size as the greenhouse, so there's no room to work and the edges wear away.
- Eyeballing level instead of checking it with a long spirit level or laser.
- Skipping compaction, so the pad settles after the frame is already bolted together.
- Leaving the greenhouse unanchored, or anchoring into something that isn't solid.
- Building on a low spot where water collects, then wondering why the frame corrodes.
What should I put on the bottom of my greenhouse?
Inside the greenhouse you want a floor that drains and doesn't turn to mud. Compacted gravel over a woven geotextile fabric is the usual choice, and it suits most home setups.
Pavers work well if you want a firm surface for benches, pots and a wheelbarrow. Concrete is the most permanent, but it needs a fall so water can escape.
Balancing internal humidity with drainage
Greenhouses run humid. Watering, condensation and damp soil all add moisture; it has to go somewhere.
A gravel floor handles this well because water soaks straight through. With a sealed concrete floor, build in a slight fall towards a drain or the door end. Otherwise water pools against the frame.
Effective weed and pest barriers
Woven geotextile under your gravel stops weeds coming up without trapping water the way plastic sheeting does. Avoid solid plastic here, it holds moisture against everything.
A defined perimeter helps too. Timber sleepers, a paver edge or a concrete edge make it harder for couch grass and rodents to get in under the frame.

Evaluating the Most Popular Base Materials
There's no single right answer here. Cost, permanence and how much work you're willing to do all pull in different directions. Size, soil and wind exposure usually decide it for you.
Match the base to the greenhouse you're actually buying. Our polycarbonate greenhouse buying guide covers frame and panel choices; your greenhouse instructions will give the base spec the manufacturer expects.
Concrete Slabs and Strip Footings
A concrete slab is the most permanent base you can build. It gives you a dead flat floor, a clean anchoring point at every corner, and nothing that shifts with the seasons.
Strip footings are the middle path. You pour concrete under the perimeter only and fill the middle with gravel. That keeps the drainage while giving the frame something solid to sit on.
The catch is cost and commitment. Concrete is the priciest option, it needs proper preparation underneath, and moving the greenhouse later means breaking it up.
Load capacity and long term stability
Concrete carries weight better than anything else on this list. If you're planning heavy benching, big pots or a water tank inside, it won't sink or rut.
It also holds level indefinitely on reactive clay, which is where gravel and timber can move. Just make sure the slab is prepared and drained properly, because a slab that traps water is worse than no slab at all.
Compacted Gravel and Crushed Rock
Compacted gravel is the practical default for most home greenhouses. Angular crushed rock or road base locks together when you compact it, unlike smooth pea gravel, which stays loose.
You mark out the footprint with extra room on each side, then dig to an even depth. Lay geotextile, build the gravel up in layers, and compact each layer. A hired plate compactor makes a big difference.
It's the cheapest of the solid options and the easiest to fix. If a corner settles, you lift, add and re-compact.
Natural drainage and ease of levelling
Rain goes straight through gravel, so the frame never sits in water. That's the single biggest reason it suits Australian conditions, where a downpour can dump a lot of water quickly.
Levelling is forgiving too. You can rake and check as you go, rather than getting one shot at it like you do with a pour. On clay-heavy ground, go deeper with the gravel or run a drain away from the pad.
Hardwood Timber and Treated Sleepers
A timber perimeter filled with gravel is a tidy, economical compromise. The sleepers hold the gravel in, give you a straight edge, and provide a fixing point for the frame.
It's a good option on a slight slope, because you can build the low side up rather than excavating the whole area. It also looks more finished than loose gravel running out into the lawn.
Use timber rated for ground contact, not the above-ground stuff. Business Queensland sets the line clearly: H3 is for timber kept off the ground but exposed to weather, while H4 is for timber in contact with the ground or continually damp. A sleeper holding back a gravel pad is H4 work. Anything sitting on damp soil will fail early if it isn't rated for it.
Moisture protection and rot resistance
H4 treated pine or a naturally durable hardwood will both do the job. If you would rather avoid preservatives near edible plants, check the in-ground durability class of whatever you pick, because plenty of timbers that last decades above ground rot quickly once they sit in soil.
Keep the timber out of standing water. A gravel bed underneath the sleepers, plus drainage away from the pad, does more for lifespan than the timber grade alone.
Check it once a year. Push a screwdriver into the corners and the lowest section, and replace anything soft before the frame starts moving with it.

Selecting a Greenhouse Model for Your New Base
Work out the base and the greenhouse together, because footprint, weight and anchoring all follow from the model you choose. Browse the My Acre range of greenhouses to compare sizes and frames before you start digging.
Once you've settled on a model, its instructions will tell you the base size and anchor points to build for. Get in touch if you'd like a hand matching a greenhouse to your site.
You May Also Like:
About the author:
“I have a real passion for helping transform outdoor spaces so people can relax, connect and entertain with confidence and pride. With My Acre, I love guiding homeowners to create beautiful and functional outdoor living areas."